;)

;)
;)
;)
;)
;)
;)
;)
;)
;)
;)
;)
;)
;)
;)
;)
;)

;)
;)
;)
;)

;)


;)
;)
;)
;)
| Home » Categories » Multiple Categories | ||||
How To Add A USB Disk As VMFS Datastore In ESXi 6.7 |
||||
|
Article Number: 126 | Rating: 5/5 from 1 votes | Last Updated: Fri, Sep 20, 2024 at 12:44 PM
|
||||
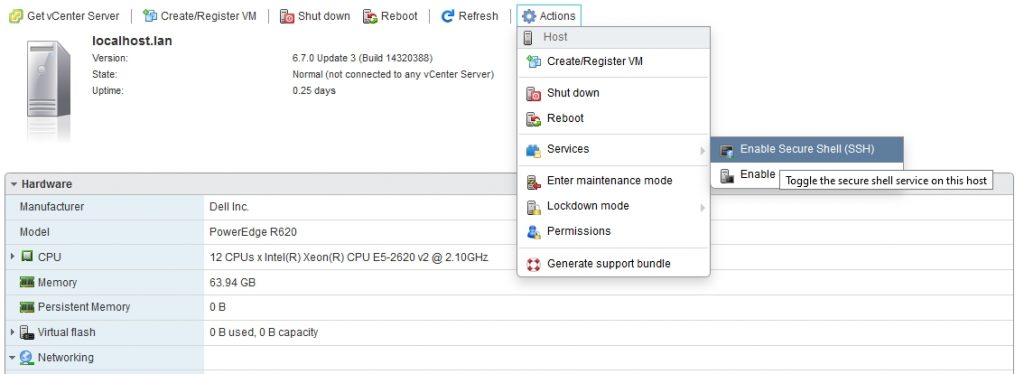
NotePlease note that in the ESXi 6.7 version, USB devices larger than 2TB are not supported. Step One – Enable SSH Access To ESXi HostConnect to ESXi IP address, go to Actions and then select Services and Enable Secure Shell (SSH).
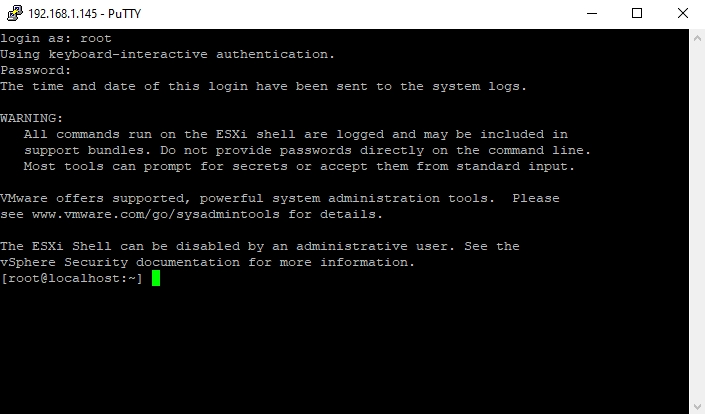
Step Two – Connect To ESXi Host Using SSHWith your preferred SSH client, mine is Putty, start a connection to the ESXi host.
Step Three – Stop USB ArbitratorYou have to stop USB Arbitrator Service. The service is used to passthrough the USB devices from hosts to a virtual machine. Once stopped, you will not be able anymore to passthrough USB devices to VMs. # /etc/init.d/usbarbitrator stop To maintain the stopped status of the service after reboot, insert the command: # chkconfig usbarbitrator off Step Four – Plug In The USB Device To The ESXi Host And Get The Device IdentifierConnect USB device to the ESXi host. Then get the device identifier by issuing the following command in Putty: # ls /dev/disks/ 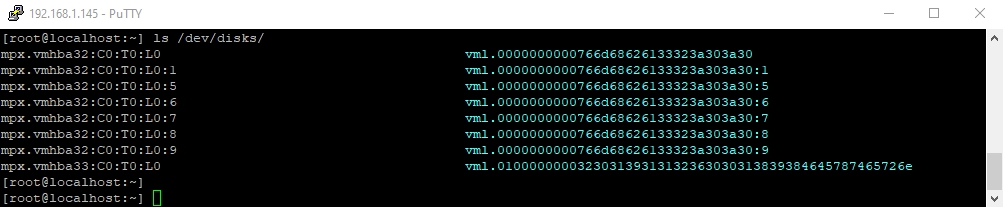 First USB device is the stick which is booting the ESXi software, so the second device is the USB Disk that we’d like to use for the datastore – mpx.vmhba33:C0:T0:L0 Step Five – Write A Label To The DeviceWrite a gpt label to the USB device using its ID # partedUtil mklabel /dev/disks/<deviceID> gpt Step Six – Create PartitionIn order to create the partition, we need to have a few info: To calculate the end sector, we’ll issue the following command first: # partedUtil getptbl /dev/disks/<deviceID>
Use this formula to get the end Sector: Or you can use this formula: # eval expr $(partedUtil getptbl /dev/disks/<deviceID> | tail -1 | awk '{print $1 " \\* " $2 " \\* " $3}') - 1
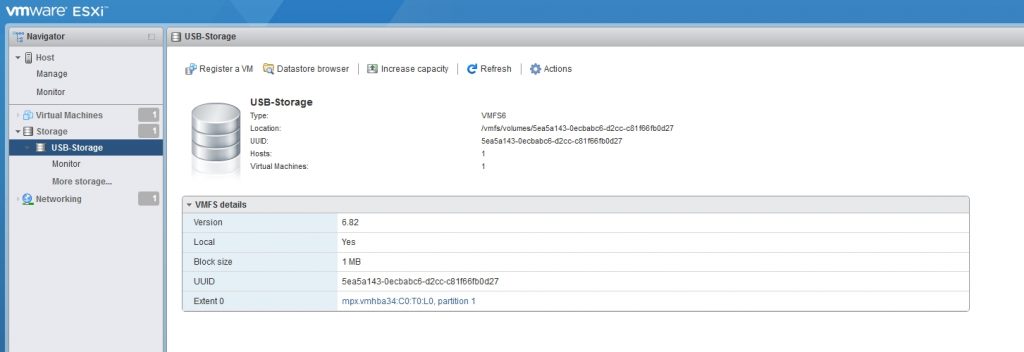
 Now we have all the info and we can create the partition using the command: # partedUtil setptbl /dev/disks/<deviceID> gpt "1 2048 <endSector> AA31E02A400F11DB9590000C2911D1B8 0"  Step Seven – Format Partition With VMFS6We’ll format the partition now with VMFS6. Please be aware that we have “:1” after the deviceID. # vmkfstools -C vmfs6 -S USB-Storage /dev/disks/<deviceID>:1 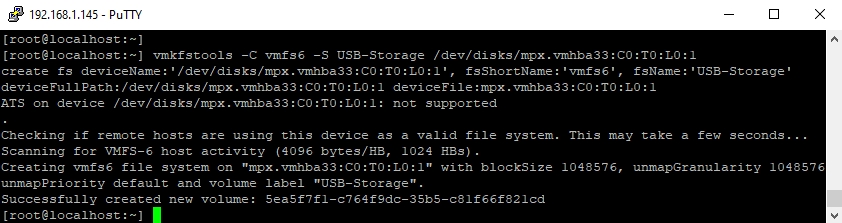 Step Eight – Check Datastore In ESXiReturn to ESXi and check the Storage tab. You should see here the new Datastore.
We have managed to add the USB-Disk as VMFS Datstore and we can now deploy VMs on it. I will proceed with the installation of vCenter Appliance. Source |
||||
|
| ||||
Attachments

There are no attachments for this article.
| ||||
Comments  There are no comments for this article. Be the first to post a comment.  Add Comment Add Comment | ||||
Related Articles 
How to Convert Provisioning Thin to Thick VMware Disk with vmkfstools
Viewed 4097 times since Sat, Jan 1, 2022
Convert Thick Provision Lazy Zeroed Disk to Thin on VMware ESXi by vmkfstools
Viewed 1132 times since Sat, Jan 1, 2022
Enable content Copy/Paste between VMRC client and Windows/Linux Virtual Machine
Viewed 1464 times since Mon, Jan 3, 2022
QemuIMG - How to Convert VHD to VMDK: A Step-By-Step Guide
Viewed 1231 times since Sat, Jan 1, 2022
Migrate qcow2 images from KVM to VMWare
Viewed 4587 times since Sat, Feb 20, 2021
How to export a Virtual Machine using the VMware OVF Tool
Viewed 3160 times since Fri, Dec 31, 2021
How to Export a vSphere ESXi 6.7 Virtual Machine
Viewed 1789 times since Sun, Feb 7, 2021
Convert qcow2 to vmdk
Viewed 1349 times since Tue, Feb 9, 2021
Reclaim Used Space with VMKFSTOOLS - Punchzero
Viewed 1470 times since Sat, Jan 1, 2022
How to Install latest ESXi VMware Patch
Viewed 1787 times since Sun, Jun 19, 2022
|
| KB Home | Advanced Search | News | Glossary | Login |
|
| Navel Knowledge Base |
|
|
|